
Saunas are well known for their ability to promote relaxation, rejuvenation, and well-being. Stepping into a sauna is like entering an oasis where the stresses of daily life seem to melt away. With the ever-growing popularity of saunas, many people are now opting to build their own – seizing the opportunity to customize the perfect DIY sauna experience for their home.
DIY sauna building offers numerous advantages beyond the obvious cost savings. It allows individuals to create a sauna tailored to their specific needs, whether it’s a traditional Finnish sauna, an infrared sauna, or a steam sauna.
However, building a sauna can quickly become overwhelming without the right knowledge and guidance. In this article, we will share our sauna-building tips and tricks to help you start your DIY sauna project like a pro!
Table of Contents
DIY Sauna Planning and Preparation Considerations
Before starting your DIY sauna building project, planning and being aware of some key considerations is important. Here are some of our DIY sauna planning tips to ensure you have the best possible DIY experience:

Choose the Right Location
Begin by assessing the available space for your sauna. Consider whether it will be an indoor or outdoor sauna and evaluate the dimensions and layout of the area. This information will help you determine the appropriate sauna size and design within the allocated space.
An indoor DIY sauna is typically easier to install and may require less maintenance than an outdoor sauna. On the other hand, outdoor saunas offer more design and material selection freedom. You should also account for the number of people using your sauna when deciding on size.
If you’re building an indoor sauna, ask yourself the following questions:
- Does this location allow for proper ventilation?
- Is there enough space for seating?
- Where would the heating elements go?
- Are there any potential obstacles to avoid?
For outdoor saunas, you must consider the following:
- Do I have sufficient privacy?
- Is there protection from the elements?
- Will additional electricity and plumbing be required?
No matter where you put your sauna, remember size matters. The larger the sauna, the harder your heat source will have to work – which can be more costly. If you need to heat a larger sauna, say 10×12 feet, you may need to consider a more powerful heat source.
Set Your Budget
The cost of a DIY sauna varies greatly depending on the materials you choose and the complexity of your design. Having realistic expectations and setting a budget are essential to ensure you don’t overspend during the project.
You must factor in the costs of the following:
- Materials
- Tools
- Sauna-specific equipment
- Electrical and plumbing work (if required)
- Seating
- Home insurance increases (some policies may require additional coverage if you’re adding a sauna to your home)
- Chosen optional extras
As with any project, research the materials and equipment you plan to purchase and compare prices between different suppliers.
Pick What Type of Sauna You Want
Once you’ve chosen the location and set a budget for your DIY sauna build, it’s time to decide on the type of sauna you want. There are various sauna types to choose from, including traditional Finnish saunas, infrared saunas, and steam saunas.
Each type offers unique benefits and considerations, such as:
- Finnish Saunas: Finnish saunas are the traditional saunas with burning wood and a stove to create heat. They don’t require any electrical or plumbing work to function, as the heat is naturally generated.
- Infrared Saunas: Infrared saunas use panels instead of hot rocks and a stove to create heat. They require electrical wiring and extra insulation, depending on the chosen location.
- Steam Saunas: Steam saunas use a steam generator to create steam, which is then released into the sauna. Steam rooms will need additional plumbing work to function.
Finnish saunas are by far the easiest DIY sauna as they offer a more ‘off-the-grid’ approach. As the heat source is not electrical, installation can be much simpler. However, there are times even Finnish saunas need extra electrical work. If there is no light source, or if you want to use a built-in electrical thermostat, wiring is needed.
A more modern take on the traditional Finnish sauna uses an electric heater. This option will require additional wiring to power the heater but can be safer for use indoors.
DIY Sauna or Sauna Kit
When building a sauna, you have two options: buy a complete DIY sauna kit or build the sauna yourself from scratch.
A DIY sauna kit will usually come with all the necessary materials and detailed instructions on assembling it. Though these kits are usually more expensive than building from scratch, they are often the easiest and quickest option.
On the other hand, if you have some DIY experience and are confident in your skills, a great way to save money is to build the sauna from scratch. This will require more research and time, but making a quality sauna without spending too much money is worth it!
Check Local Regulations
Different locations worldwide will have different rules and regulations for installing a sauna. Before starting the project, research any possible permits or rules you must adhere to.
If you’re building your DIY sauna inside your home, there may not be any regulations to worry about. Although, certain areas may require specific aspects of the installation (like electrical work) to be carried about by a professional – especially if you plan on selling or renting out your home.
Even if this is not the case, we always recommend consulting a professional for any electrical or plumbing work to ensure your sauna is installed safely.
DIY Sauna Design and Construction
Once you have completed the planning and preparation phase, it’s time to delve into the design and construction of your DIY sauna. If you’re using a sauna kit, you don’t necessarily need to worry about the design as it will be included in the instructions – but you still have to construct it!
Here are some DIY sauna design and construction tips and tricks to keep in mind:
Select Your Building Material
Choosing the right building materials is essential for creating a durable and visually appealing sauna. Every detail counts when building something from nothing, and you need to ensure the materials are of good quality.
Wall Construction
Wood is the most common material used in the construction of a sauna. Opt for wood that is suitable for the sauna environment, such as moisture-resistant cedar, pine, or hemlock. These woods offer natural resistance to mold and mildew and provide a pleasant aroma in the sauna.
Cedar is the most popular choice, but it can be expensive. Many DIY sauna builders opt for cedar as the main lining inside the sauna and use other woods for exterior cladding.
Floor Materials
When it comes to the floor, you want a material that will be safe and comfortable to walk on. For this reason, we recommend non-slip tile, concrete, wood, or natural stone.
Insulation
When building a sauna, insulating well is essential for maintaining a consistent temperature and reducing energy costs. Adding extra insulation between the walls or ceiling will help keep the heat in and also provide acoustic protection from outside noise.
Fiberglass insulation specifically designed for saunas is readily available and is the best choice for DIY sauna builders. It’s easy to install and won’t deteriorate over time.
Vapor Barrier
Saunas can be moist environments, as some heaters require you to pour water over hot stones. A proper vapor barrier is necessary for a successful and safe sauna project.
Adding a vapor barrier will help prevent any excess moisture from seeping into your walls and causing long-term damage.
Use an aluminum foil barrier and staple it to the wall and ceiling before adding the wood lining. You can also seal the seams of the vapor barrier with some foil tape. This will create a watertight seal and help keep the air in your sauna dry.
Heating Element
The heating element of your sauna will entirely depend on what type of sauna you have chosen. Electric or wood-burning heaters are known as dry sauna heaters, while infrared and steam saunas require different heating elements.
Irrespective of the type of heater you plan on using, make sure you position it correctly and always leave some distance between the heater and any windows or seating.
Ventilation
Any sauna needs to be well-ventilated. You want a vent for incoming air above the sauna heater and a vent for outgoing air on the opposite wall to the heater (usually under the bench). The type of vent you use will depend on your sauna’s location and type of heater.
Outdoor saunas must have protective covers for the vents to keep out rain, snow, and wind. Wood-burning heaters will need a chimney to allow the smoke to escape.
Door
The door is important as it helps keep warm air in and cold air out. For this reason, a sauna door should have an insulating core and should be airtight when closed.
Alternatively, you could use a door with double-paned glass, as the extra layer of air between the two panes will act as insulation.
Finishing Touches
You’re creating your own personal oasis, and adding some finishing touches will make it even more relaxing. You can add features like a separate shower or changing room, benches, or shelves to make your experience even more enjoyable.
If you have a wood-burning or electric sauna, consider adding an aesthetic water bucket and ladle for sprinkling the water over the hot stones.
Additional built-in thermostats and timers are available to help you manage the temperature and duration of your sauna sessions. Lighting can also be added to create the perfect atmosphere for relaxation.
How to Build a DIY Sauna
Building a sauna could be a great way to create something unique and enjoyable – if you’re comfortable with your ability to take on a DIY project. The steps that go into building a sauna can vary greatly depending on the type you want, but here are the basics of DIY sauna construction:
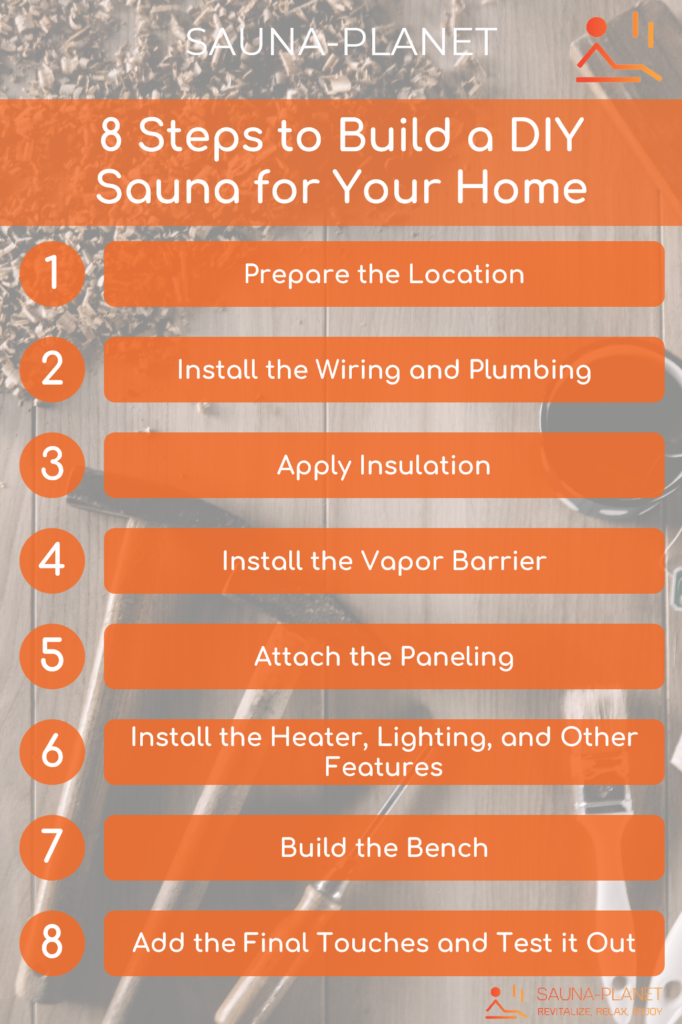
1. Prepare the Location
If you’re building your sauna inside, you must clear the area of any furniture or other items. Completely strip the walls down to the studs and rip up any carpet. It’s important that your flooring is waterproof, so if it is made from plywood, you must seal it – concrete or tile will do just fine.
If you’re building outside, ensure the ground is level and remove any grass or weeds from the area.
You’ll need to mark out a foundation and pour concrete to ensure the sauna is flat and secure. You don’t need to worry about the flooring here, as it is already made of concrete. Final touches or additional flooring materials can be added later.
If you’re unsure, consult a professional for advice on the best way to create your foundation.
2. Install the Wiring and Plumbing
If you’re installing an indoor sauna and utilizing an existing space, now is the time to wire the area for power and plumbing. This is a complex task best left to professionals, as safety is paramount when dealing with electricity and gas supply.
Plan out exactly where you want everything to go, and wire the exposed studs for your electric heater (if using), lighting and light switch, thermostat, and any other electrical device you require.
Now is also the time to install a gas pipe if using a gas heater. Ventilation ducts/fans will also need to be installed in the walls, with wiring and pipes added where needed.
Please note: if you’re building an outdoor sauna from scratch, the process will alter slightly:
- You will first need to build a wooden frame for the walls and ceiling.
- Next, you will install insulation (the following step on this list).
- Then it’s time to wire the frame with electrical wiring for your heater, lighting, and other devices. Don’t forget to leave spaces for your ventilation system/chimney and any windows.
3. Apply Insulation
There are different widths of fiberglass insulation available in rolls. Choose the one best suited to your space, and apply it as tightly as possible to create an even layer of insulation on all walls and the ceiling. Cut out sections where necessary, such as around your lighting and power outlets.
4. Install the Vapor Barrier
Now that your insulation is in place, you must cover it with a vapor barrier. This is necessary to prevent moisture from seeping into the insulation and causing water buildup or mold. A foil-vapor barrier is recommended, as it is stronger than plastic and will better prevent moisture damage.
Staple the vapor barrier to the studs, ensuring it is placed as tightly against the insulation as possible. Overlap the seams by at least 3 inches and use foil tape to seal them.
5. Attach the Paneling
Attach one panel at a time to the studs starting with the ceiling. Always point the tongue of the board away from the wall, and then use the groove of the next board to “lock” them together. Use a nail to secure the panel to the studs.
Continue with this process until all of the walls and ceiling are paneled. Be sure to cut out sections for your ventilation system, lighting, and other features. Now is also a good time to install your sauna door if you haven’t done so already.
Please note: you should never paint, varnish or stain the paneling. Sauna paneling must remain natural so the wood can absorb and evenly distribute heat.
6. Install the Heater, Lighting, and Other Features
Always follow the manufacturer’s guidance when installing your DIY sauna heater. There may be advice on clearance distances and installation locations – pay close attention to this. Installing the heater may be as simple as washing the stones and plugging it in, but always check this first.
You can now install the rest of your features, such as lights, windows, and the thermostat. Always seek professional advice if you’re unsure of any wiring and plumbing installation.
7. Build the Bench
Now, it’s time to build the seating of your DIY sauna! Depending on your skill level, the benches can be as simple or complex as you like. Choose a smooth, knotless wood like clear cedar, and sand it down to provide a comfortable surface.
Attach the bench/s directly onto your wall studs or onto brackets if you want removable benches.
Your benches should be wide enough for a person to sit comfortably and high enough so that the user can stand without straining. Remember to stagger the bench widths if creating an upper and lower bench. The lower bench should be wider than the upper.
Alternatively, you can create a “staircase effect” where the lower bench is thinner than the top – the choice is yours! Always use additional wood for support so your benches are secure and won’t move around.
8. Add the Final Touches and Test it Out
Now you can enjoy your complete DIY sauna! Add a handrail, a small table, and towels if desired. Turn on your heater and use it as instructed to test it out. If everything is working correctly, you can start using your sauna!
Safety Considerations When Building a DIY Sauna
When building a DIY sauna, it is important to consider safety. Always follow the instructions of any electrical and plumbing equipment you use, and never try to repair the heater yourself. Ensure all your wiring and insulation are correctly installed, and always allow for adequate ventilation.
If you don’t have adequate training or experience in electrical or plumbing work, always contact a professional for advice. You want your new sauna to be a place of relaxation and safety – not danger!
How to Maintain Your At-Home Sauna
You don’t want your home sauna to lose its luster over time, so you must properly maintain it.
Let’s take a look at some tips and tricks on how to keep your DIY sauna looking and feeling like new:
- Clean the walls and benches regularly, using a damp bristle brush. Simply use the brush to scrub the surfaces. You can use some mild soap if it is necessary, but be sure to rinse off with clean water afterward.
- Vacuum any dust or debris that has collected on the surfaces or in any corners, crevices, and underneath benches.
- Remove your shoes and clean your feet before entering the sauna.
- If you use a wood-burning stove, practice safe burning techniques and clean up any ash or debris regularly.
- Check the electrical equipment every now and then for frayed wires, burned insulators, and other signs of wear and tear.
- Air out your sauna for a few minutes after each use. You can open the door and vents to allow air to circulate and speed up the drying process.
Final Thoughts on Our Tips and Tricks for Building a DIY Sauna
Building a DIY sauna is a great way to relax and unwind in the comfort of your own home. It can provide a calming atmosphere and allow you to escape from everyday life. Building your own sauna at home is not overly difficult, but it does require a bit of skill and knowledge.
Be sure to follow all safety instructions and consult with professionals if unsure of any steps. With the right tools and materials, you can create a DIY sauna space that is perfect for relaxation and rejuvenation!